It is very easy to create a script that can be used to apply processing templates to your spectra, as described in the procedure below:
1. First, you will need to create a processing template for each type of experiment. For example, let's create a processing template for HETCOR spectra. To create this, open the HETCOR experiment in Mnova and select ‘Processing/Processing Template’ from the menu. Finally, add the desired processing options for F1 and F2. as per the following figure. Finally, click on the 'Save' button to save the resulting processing template:

In a similar manner, create other processing template scripts to process 1H and 13C spectra and save them to your hard disk.
2. Now create a script to launch this processing template just with one click. Run Mnova, select menu ‘Scripts/Edit Script’ from the menu and copy the following script:
The beauty of this script is that you can create different processing templates for your spectra. You will only need to create each processing template for each type of spectrum and save them to your C: drive. Of course you can save the template wherever you want, but you will need to modify the corresponding path in the script (see the secftions highlighted in yellow in the example above). Note that you can also add various processing templates for different experiments; for example, for a COSY spectrum, you will need to add the corresponding information to the script:

3. Once you have made the relevant changes in the script, save it in the Mnova scripts folder (similar to the above, you can also save this script in your preferred folder, but you will need to add this folder by selecting ‘Scripts/Scripts Directories' from the menu).

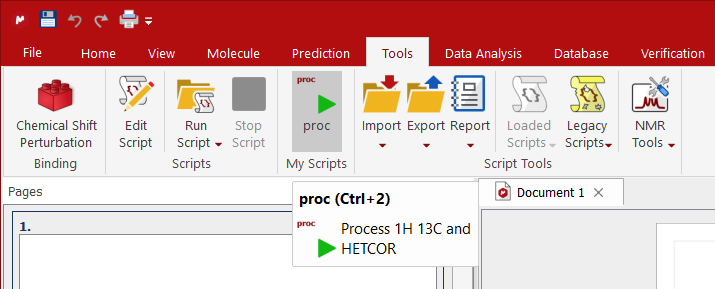
4. Restart Mnova, and select ‘Scripts’ in the menu. You will see an entry named ‘Proc’ in this section of the menu. You can run this script directly from the menu, or also just by using the shortcut ‘Ctrl+2’ (you can modify this shortcut in the first line of the script according to your preferences).

5. You can also add a button to run this script from any toolbar in the interface. To do so, right click on any toolbar and select ‘Customize toolbars’. Find the script named ‘Proc’ on the right-hand side of the window (almost at the end)and add it to the desired toolbar using the blue arrow button and clicking OK:
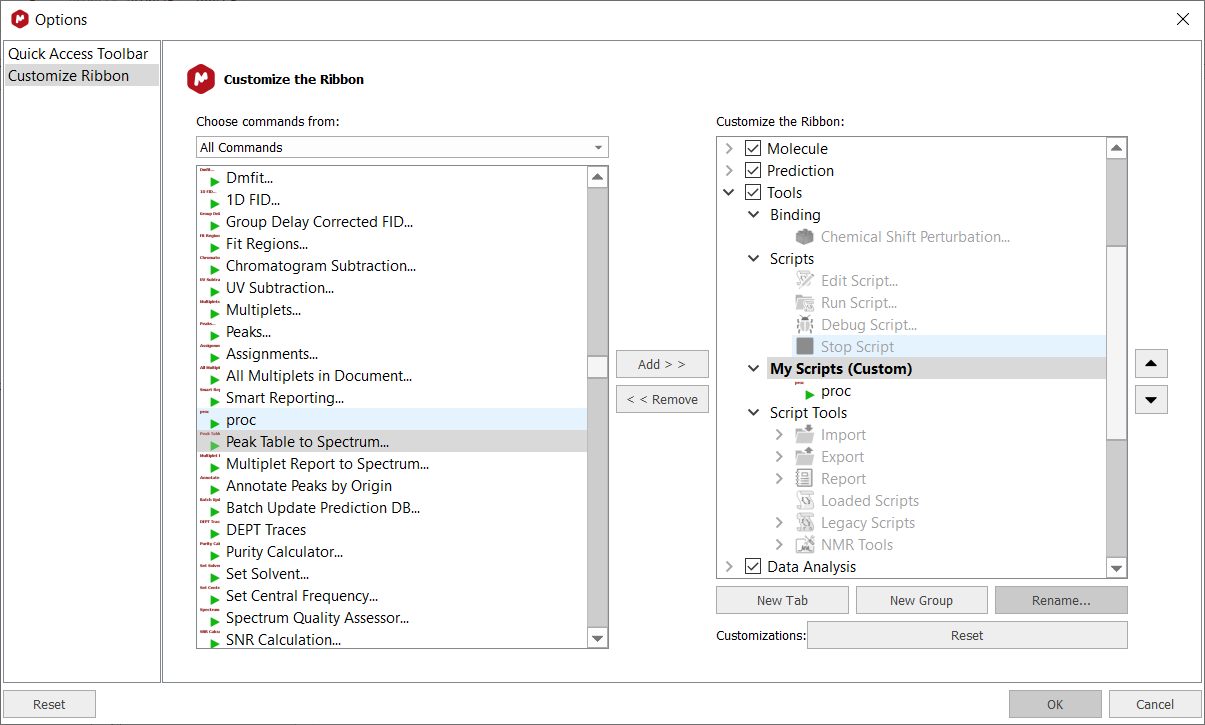
This will add an icon to the desired toolbar that will allow you to run the script with a single click.