
This tutorial describes the way Mbook is structured from the work space point of view.
The work space
The DESK is the Group Manager´s work space, containing the list of Projects, Reactions and their corresponding Experiments. It also displays a summary of your experiments in a very simple way. Your chemistry should be structured into these different categories:

From the DESK, any Group Manager or Project Manager can create new Projects:

Once you have created some projects, the DESK panel will display a project tree like the one below:

When creating your Project you will able to add it to any of the existing groups:
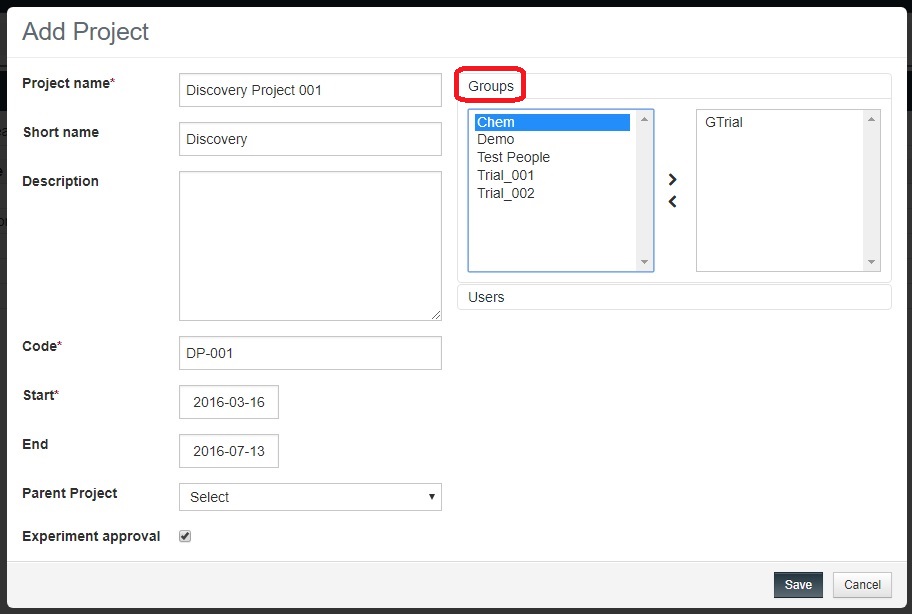
The User´s tab allows you to add any users to the Project.:

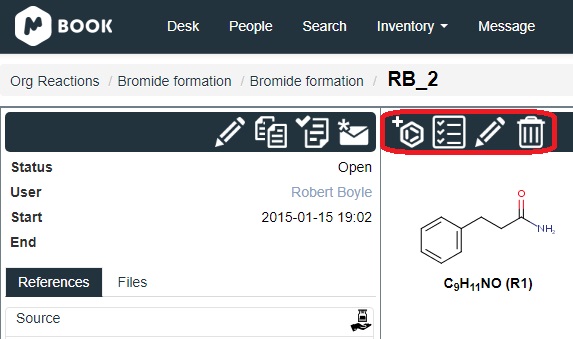
Once a Project is created, you can add Reactions to it by clicking on the following icon and filling in your new reaction´s details:


And finally create your Experiments within your Reactions: (The following video was prepared for Mbook v 1.0)

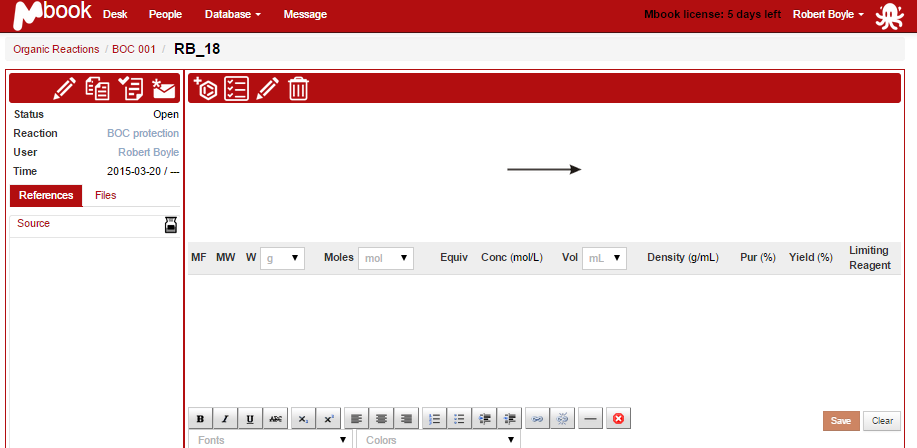
Once you click on the “Add Experiment” button the Experiment working area will display a lay out (as shown below) before you enter your experimental conditions:
Mbook has been designed to record all your experimental conditions (reagents, products, amounts of reactant, solvents and products, reaction description, etc.) in a very intuitive way. On the Experiment panel there are several tools to help you enter your experimental conditions in a very easy and simple way.
On the left hand side of the Experiment panel you can edit information such as code, status, project, reaction and start/end date of your experiment by clicking on the highlighted icon:

On the right hand side of the Experiment work area you can find several options to help you enter your experimental data such as adding reaction participants and experimental conditions:
For a more detailed process you can read the following tutorial about entering your reaction participants and experimental conditions.
Participants:
Click on this icon to Add/Edit and Delete Participants (reactant, solvents and/or products) of the experiment. A more detailed guide on how to add participants either using the molecular editor package or by using Mbook’s compound database can be seen in the following tutorial about adding Participants.
Experiment conditions:
Click on this icon to enter your experimental conditions such as temperature, pressure, pH, time, etc. There is also a box where you can enter a text or a reaction description.

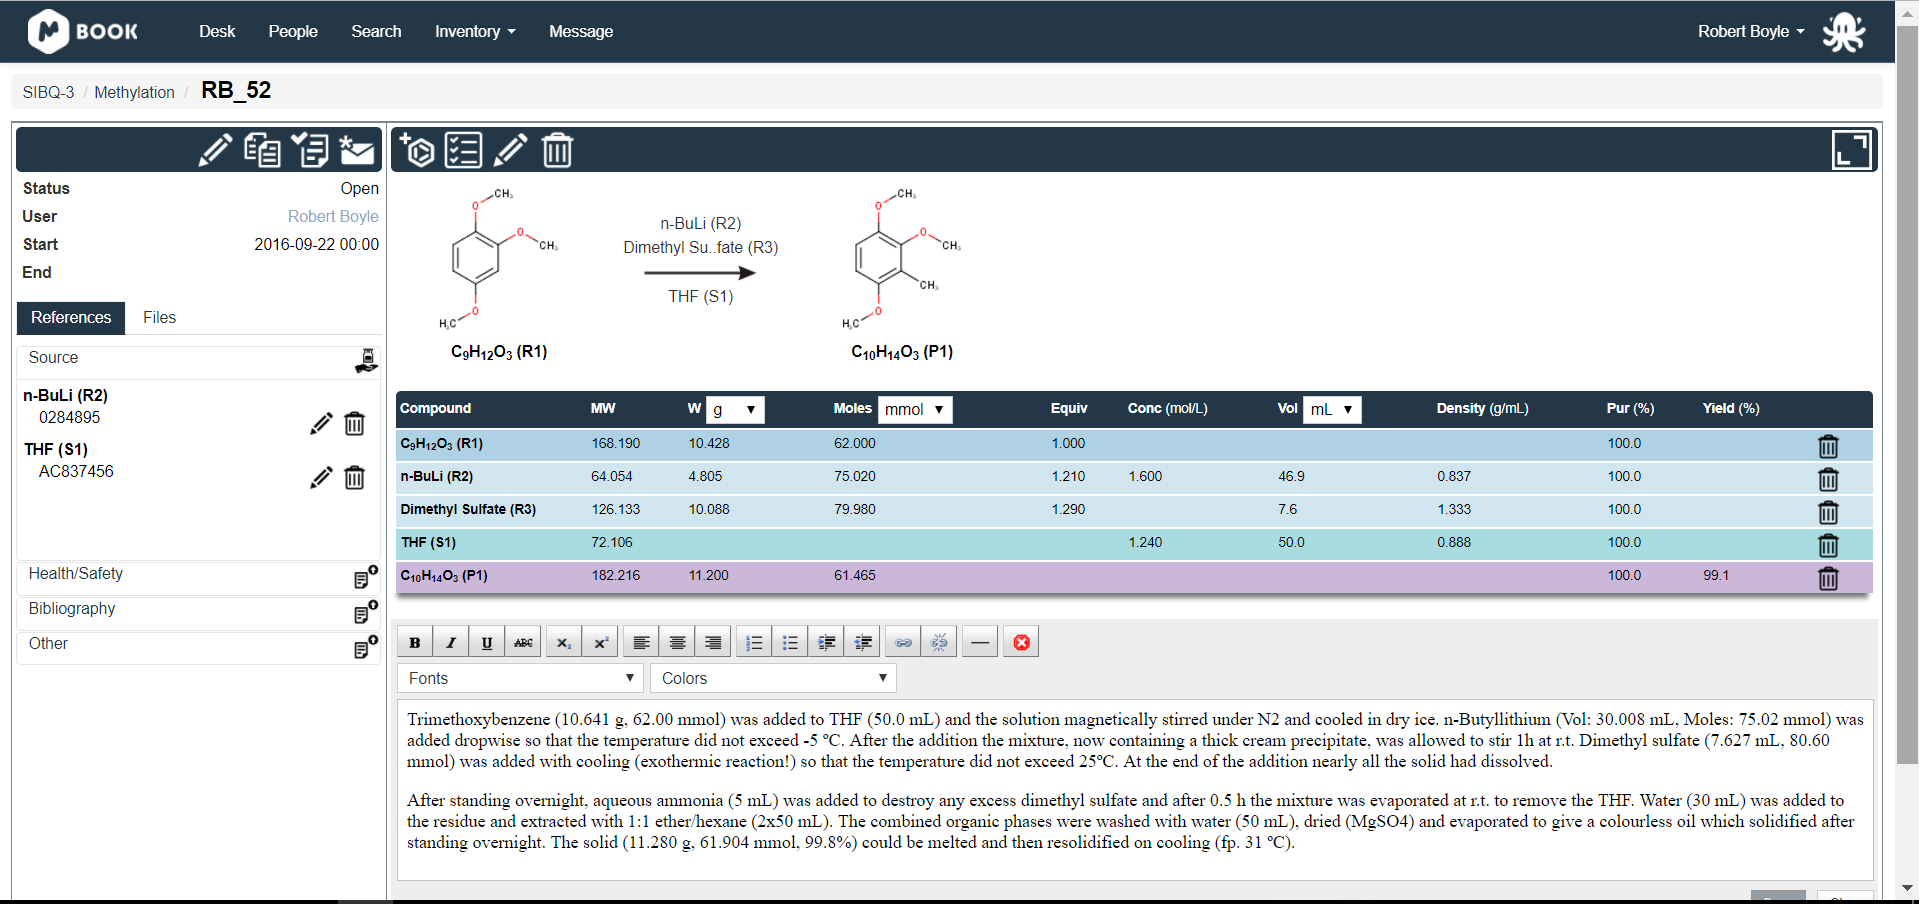
The Experiment table:
Once you have all the Participants and Experiment conditions you can also select the limiting reagent and the applicable amounts of reagents and solvents in the stoichiometry table. When you complete this step the experiment table should look something like this:
You can watch this video about creating experiments
Cloning experiments:
You can create new experiments using an existing one as starting point by using the "Cloning" option. You will find this option very useful when repeating experiments using different conditions, etc.


The structured nature of the DESK working space allows you to neatly record your chemistry.


